Streamline FF14 TOTP Login with BitWarden API Integration
Harnessing the Power of Bash Scripting in Linux for Lightning-Fast Game Server Access
Overview
-
The XIV Launcher provides a custom REST API that allows seamless integration with TOTP input. By leveraging this functionality, we can automate the TOTP input process using bash scripting.
-
BW-CLI, a powerful command-line interface for Bitwarden vaults, offers seamless terminal interaction with both self-hosted and official servers. With this tool, we can extract the required TOTP when needed.
-
By combining these tools, we can create a bash script that automates the login process for FF14 gameservers and create a convenient desktop icon for quick access. Let’s dive into the magic of bash scripting and streamline your FF14 gaming experience!
Software Requirements
These tools are essential for the upcoming steps. If you haven’t installed them yet, please follow the provided links to download and set them up on your system.
Ubuntu Installation Guide
To streamline the installation process on Ubuntu, follow these steps:
- Enable Flatpak by executing the following command:
sudo apt update && sudo apt install flatpak - Install XIV Launcher by executing the following command:
flatpak install dev.goats.xivlauncher - Install BW-CLi by executing the following command:
sudo snap install bw-cli
By following these steps, you’ll have XIV-Launcher and BW-CLi up and running on your Ubuntu system.
Extracting the TOTP with BW-CLI Manually
To extract the TOTP using BW-CLI, follow these steps:
-
Install BW-CLI on your system. If you haven’t done so already, refer to the official documentation for installation instructions specific to your operating system.
-
Optionally, configure BW-CLI to use your own bitwarden or vaultwarden server, substituting your own server in place of the URL:
bw config server https://vaultwarden.yoursi.te -
Open your terminal and authenticate with BW-CLI by running the following command:
bw loginThis command prompts you to enter your Bitwarden username and master password to securely authenticate with your vault.
Take a note of the session ID, and use it in the below commands. -
You need to search for the ID of the login entry for FF14 in your Bitwarden vault.
-
Run the following command to search for the login entry and retrieve its ID:
bw list items --search <item-name> --session <Session ID>Replace
<item-name>with the name of the item in your Bitwarden vault for which you want to extract the TOTP. Additionally, replace<Session ID>with the session ID obtained during the login process (step 2).The command will output information about the matched items. Identify the entry you’re interested in by examining the output.
-
Optionally, to extract only the ID of the login entry, you can use the following command along with jq:
bw list items --search <item-name> --session <Session ID> | jq '.[].id'
-
-
Now use the following command subsittuing the identified parameters to return the TOTP:
bw get totp <item ID> --session <Session ID>BW-CLI will output the TOTP for the specified item.
Automating
-
We need to handle the method of getting the vault password. BW-CLI does support importaing passwords from a text file or environment field, however because leaving passwords in plain text is insecure, here we will prompt for the vault password at runtime using Zenity. The below command will prompt the user for their password. This example is shown with pipign the output to /dev/null since we never want to send secrets to stdout.
zenity --password --title="Unlock Bitwarden Vault" > /dev/null -
We can combine this command with our previous bitwarden login to create our automated login command, chaning a lock command after to invalidate the secret as soon as possible:
bw unlock $(zenity --password --title="Unlock Bitwarden Vault") && bw lock -
Now we will fiter the output to return only the session ID:
bw unlock $(zenity --password --title="Unlock Bitwarden Vault") | grep "export" | cut -d '"' -f 2 && bw lock -
Now we can write the full command to get the FF14 TOTP, subsituting in
item IDfor the Entry ID found in the previous section, part 4.bw get totp <item ID> --session $(bw unlock $(zenity --password --title="Unlock Bitwarden Vault") | grep "export" | cut -d '"' -f 2) && bw lock > /dev/null
Using the XIV Launcher API
To use the API to enter the TOTP, it’s first enccesary to configure the launcher:
-
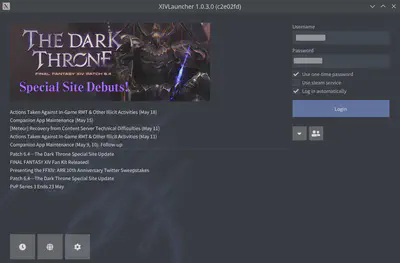
On the Main Screen, tick Log in Automatically, and Use one-time Password:
-
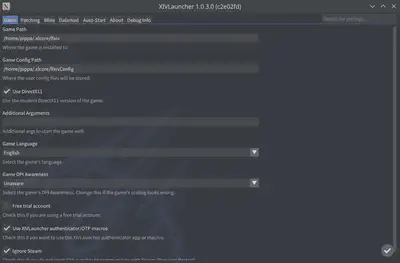
On the settings screen, Enable “Use XIVLauncher Authenticator / TOTP Macros”
-
Proceed to login in as normal, until the TOTP entry shows. Whilst the window is shown, a web server is being run at http://localhost:4646 which provides an API for TOTP entry.
-
We can input the TOTP now from the commandline. To do so, get a valid TOTP and run the following command, substituing
<TOTP>for your current valid One Time Password:curl http://localhost:4646/ffxivlauncher/"<TOTP>"Observe how running this command with a correct TOTP lets XIV Launcher login, without needing manual TOTP entry.
Putting it together
To now put the two aprts together into a single automated step:
-
We can run XIV Launcher from terminal with the command:
flatpak run dev.goats.xivlauncher &Where the ampersand backgroudns the task, and allows us to keep typing int he terminal.
-
XIV Launcher is properly configured should open up straight to the OTP entry screen, and run the API at http://localhost:4646/ffxivlauncher.
-
We can then run our full TOTP command through curl to automatically input the TOTP:
curl http://localhost:4646/ffxivlauncher/"$(bw get totp <item ID> --session $(bw unlock $(zenity --password --title="Unlock Bitwarden Vault") | grep "export" | cut -d '"' -f 2) && bw lock > /dev/null)"This will prompt the user to unlock their bitwarden vault, provide the TOTP straight into XIV Launcher and lock the vault again
-
We can now chain the commands together to have everythign in a single line of code:
itemID=<itemID> && \ flatpak run dev.goats.xivlauncher & \ curl http://localhost:4646/ffxivlauncher/"$( \ bw get totp <item ID> \ --session $(bw unlock $(zenity \ --password \ --title="Unlock Bitwarden Vault" \ )| grep "export" | cut -d '"' -f 2) && \ bw lock > /dev/null)" -
Whe running this command we can observe an issue, that our XIV Launcher window takes priority over the Bitwarden Unlock Password Prompt. Obviously this isn’t ideal, since a password prompt should take focus untilt he user enters a password, or cancels it. We can force this by suing wmctrl:
flatpak run dev.goats.xivlauncher & curl http://localhost:4646/ffxivlauncher/"$(bw get totp <item ID> --session $(bw unlock $(zenity --password --title="Unlock Bitwarden Vault") | grep "export" | cut -d '"' -f 2) && bw lock > /dev/null)" & sleep 1 && wmctrl -F -a "Unlock Bitwarden Vault" -b add,above -
Now we can make a launcher for our desktop environment encompassing all of our work:
editor ~/.local/share/applications/ff14.desktopWith the contents:
[Desktop Entry]
Name=FF14
Comment=Custom launcher for the most critically acclaimed MMO
Exec=flatpak run dev.goats.xivlauncher & curl http://localhost:4646/ffxivlauncher/"$(bw get totp <item ID> --session $(bw unlock $(zenity --password --title="Unlock Bitwarden Vault") | grep "export" | cut -d '"' -f 2) && bw lock > /dev/null)" & sleep 1 && wmctrl -F -a "Unlock Bitwarden Vault" -b add,above
Icon=dev.goats.xivlauncher
Terminal=false
Type=Application
Categories=Game;
StartupWMClass=XIVLauncher.Core
X-Flatpak=dev.goats.xivlauncher
Once made, update the desktop database so your environment canf ind the desktop file:
sudo update-desktop-database